PowerTextor
  • Features
    • AI Textor
    • Bulk Texts
    • Personal Conversations
    • Event Reminders
    • Reviews
  • Industries
    • Nonprofits
    • Political Campaign
    • Event Management
    • Real Estate
    • Gym Text Marketing
    • Automotive Dealership
    • Retail SMS Marketing
    • SMS Marketing for Dentist
    • Banking & Finance
  • Power Automate
  • Pricing
  • Contact Us
  • Login
Request Demo
PowerTextor
Get Started

How to Connect Your Power Textor Account to Microsoft Power Automate

Home How-To's
Free SMS USA Free SMS USA

Connect your Power Textor with Microsoft Power Automate to create text messaging flows for multiple contacts and groups. With simple steps, integrate the Power Textor connector to design automated workflows and eliminate the manual effort of sending text messages to contacts and groups. The multi-purpose tool allows you to schedule messages for a larger number of recipients existing in different time zones with the ability to set the scheduled time of the text messages.

RELATED POSTS

How Text-to-Vote Campaigns Boost Product Popularity in the U.S.

How to Call Out of Work Sick: Text Message Examples

How Do You Save Text Messages on Android & iPhone?

To connect your Power Apps with the Power Textor, you need to enter the Power Textor API Key to establish the connection with your flow in Power Apps.

Generate API Key in Power Textor:

The API Key is the main component that recognizes your Power Textor account in Power Apps. To provide the API Key, navigate to https://powertextor.com/ and log in using your Power Textor username and password. Follow the steps mentioned below.

Free SMS USA Free SMS USA
ADVERTISEMENT

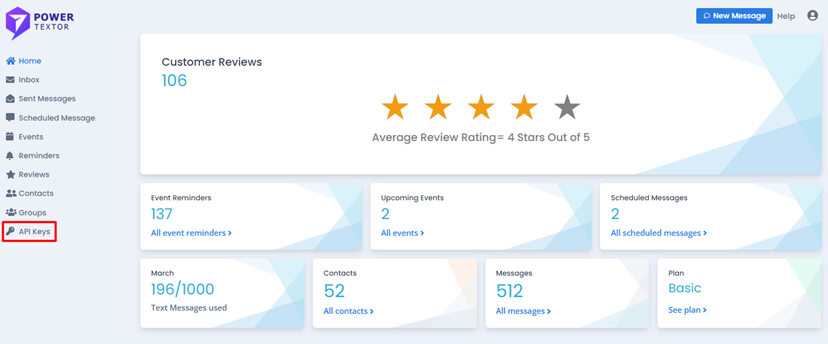
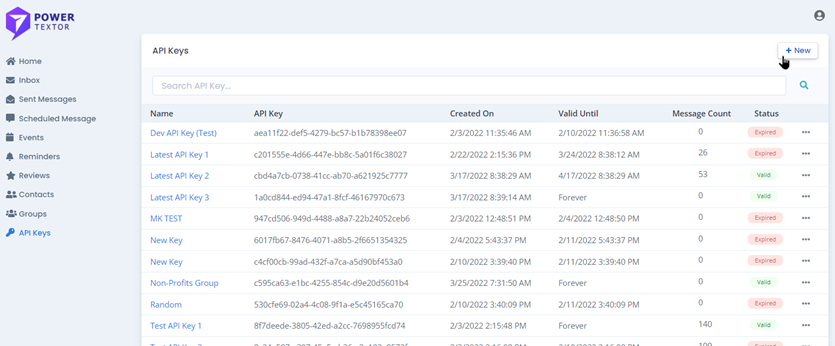
1. Click the API Key on the left pane. On the new page, click the ‘+New’ button on the top right area of the page. From here, you can generate an API Key and define its validity for use in your workflows in Power Automate.

API key generation in power textor

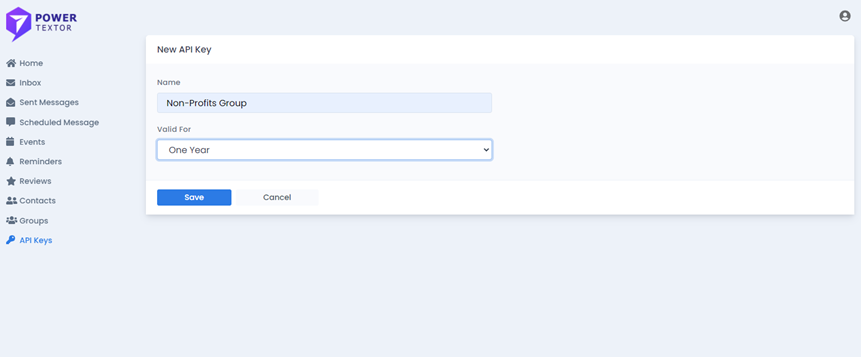
2. On the New API Key form, provide the name of the API Key. You can define the name based on the purpose you are creating it for, so it will be easier to distinguish between the API Keys when you have multiple flows running across. In the Validity field, select the validity duration from the given options to define the validity of the API Key.

  • NOTE: Make sure that you apply the validity according to the flows as an expired API Keys fails to authenticate with the Power Textor data.

3. Click ‘Save’ on the form. The page refreshes, and the system generates the API Key for you. The refreshed page shows the new API Key with the Creation Date and the Validity period. You can also modify the validity period by enabling the edit option available. Click the ‘Edit’ button, and change the selection made, click ‘Save’.

You can create as many API Keys as you want for different purposes and set different validity of each one.

Use the API Key in the workflow:

To use this API Key for using the Power Textor Contacts and Groups in Power Apps, log in to https://make.powerapps.com/  and navigate to the environment in which you will create your flow. Make sure you choose the right environment; this will allow you to use the table data that exists in the selected environment in your flow.

  1. Copy the API Key from Power Textor
  2. Log in to PowerApps and choose the environment to create a flow. Select the type of flow according to your business need.
  3. Use the Power Textor connector – for creating a new connection, provide a unique ‘Connection Name’. Paste the copied key in the ‘API Key’ field and click the ‘Create’ button.

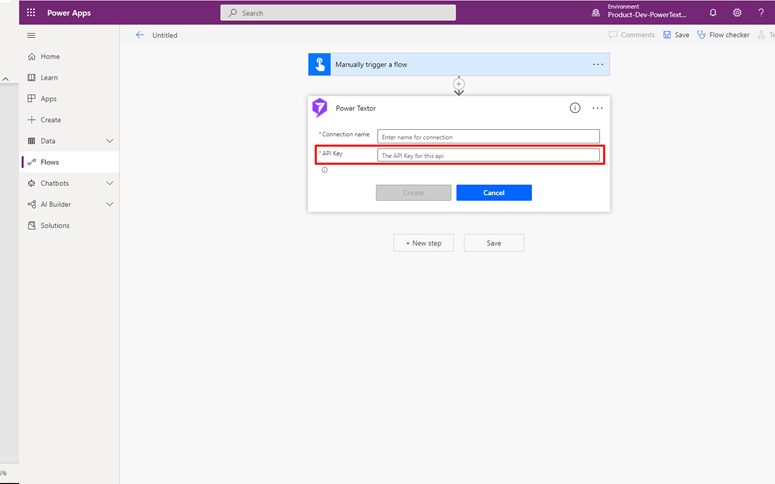
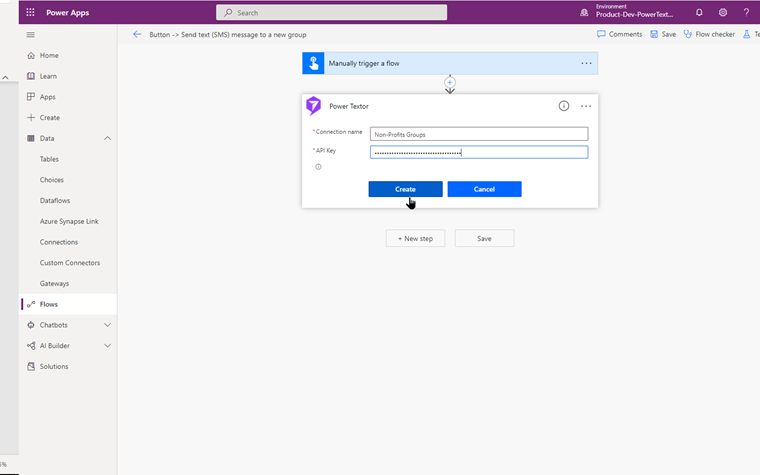
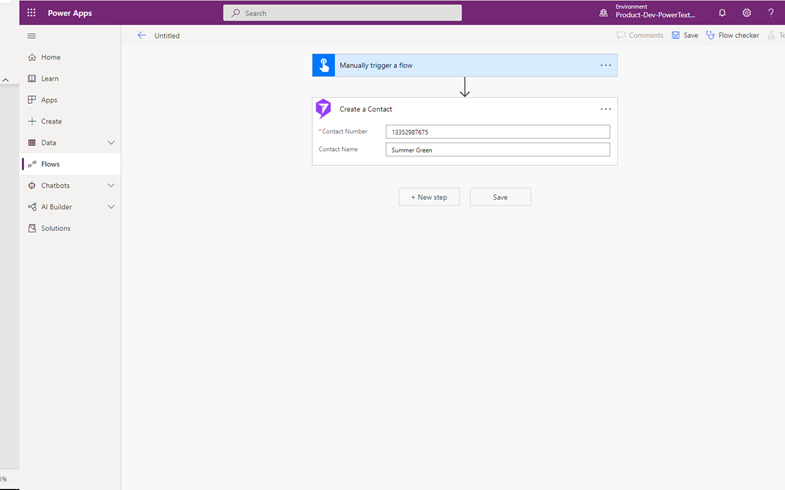
The create button successfully syncs the Power Textor Contacts and Groups with Power Apps. Now you can use the list of Power Textor actions in your workflows to trigger, send and schedule text messages.

using API key in power textor

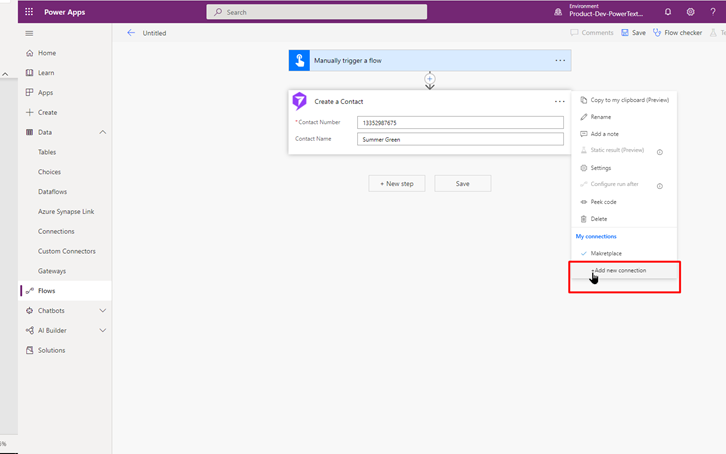
  • NOTE: There is only a one-time need to create the connection with your Power Textor database. You can add more connections by clicking ‘Add New Connection’ for using different API Keys but do not have to re-establish the connection for the same one every time.

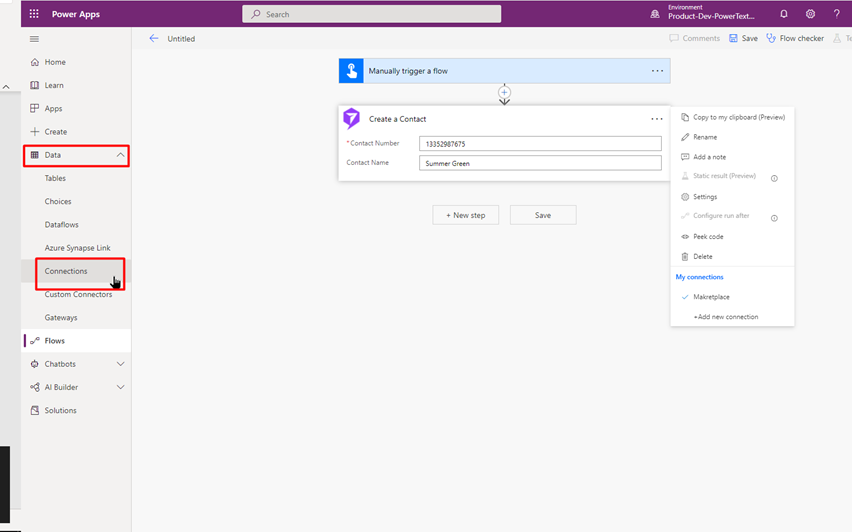
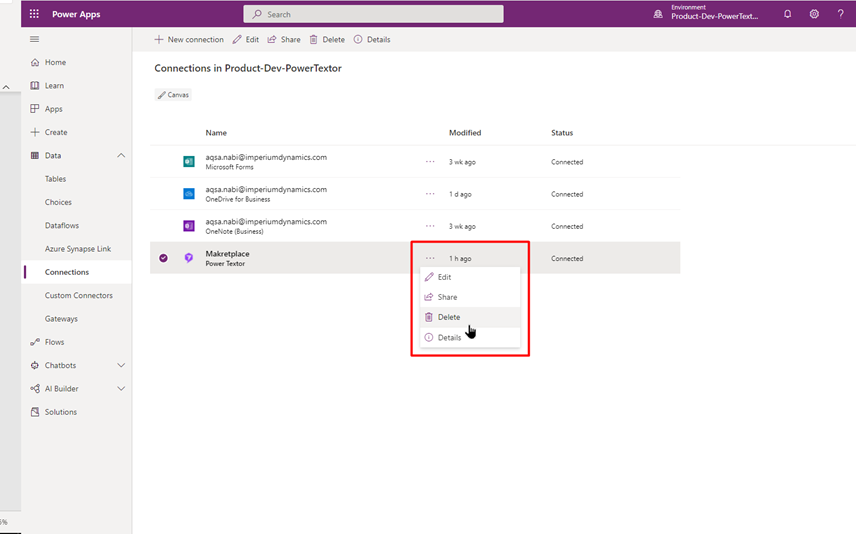
To delete a connection, navigate to the Power Apps > Data on the left pane > Click it to expand subcategories > Click Connections > Select the connection you want to remove > Click on the ellipsis > Select delete and provide confirmation in the dialogue box. This action is irreversible.

ShareTweetPin

Related Posts

text message text to vote for your favorite product example
How-To's

How Text-to-Vote Campaigns Boost Product Popularity in the U.S.

April 17, 2025
how to call out of work text
How-To's

How to Call Out of Work Sick: Text Message Examples

April 17, 2025
How Do You Save Text Messages on Android & iPhone?
SMS Guide

How Do You Save Text Messages on Android & iPhone?

April 17, 2025
how to obtain text records
How-To's

How to Obtain Text Message Records in the U.S.: A Comprehensive Guide

April 18, 2025
Newsletter Text Messages
SMS Guide

Impact of Newsletter Text Messages: Transforming Business Communication

March 19, 2025
22395 Short Codes
SMS Guide

Understanding the 22395 Short Code: Its Purpose and Benefits

March 19, 2025
Next Post
Sent-as-SMS-via-Server

What Does "Sent as SMS via Server" Mean?

How to Tell if Someone Read Your Text Message

How to Tell if Someone Read Your Text Message

Recommended Stories

campaign-site-template

Campaign Website Example Templates (Ultimate Guide)

December 4, 2024
how to call out of work text

How to Call Out of Work Sick: Text Message Examples

April 17, 2025
how to obtain text records

How to Obtain Text Message Records in the U.S.: A Comprehensive Guide

April 18, 2025

Popular Stories

  • A2P 10DLC Registration: Everything You Need to Know

    A2P 10DLC Registration: Everything You Need to Know

    0 shares
    Share 0 Tweet 0
  • What is 10DLC and Why Should Businesses Use It?

    0 shares
    Share 0 Tweet 0
  • 10DLC Campaign Use Cases for Non-Profit Organizations

    0 shares
    Share 0 Tweet 0
  • Text Symbols 101: Explore Hidden Meanings in Texting Symbols

    0 shares
    Share 0 Tweet 0
  • How to Efficiently Develop and Deploy Solutions in Power Platform

    0 shares
    Share 0 Tweet 0

Designed for Microsoft Dynamics 365 and Power Platform, Power Textor helps businesses develop better relationships with their customers through the power of text message marketing and Microsoft Power Automate.  

Quick Links

  • Features
  • Industries
  • US A2P 10DLC
  • Power Automate
  • Documentation
  • Pricing
  • Contact Us

Company

  • About Us
  • Blogs
  • FAQs
  • Privacy Policy
  • Terms of Service
  • Security Policy

Get in Touch

(331)250-2717

info@powertextor.com

Chicago,IIlinois

Powered byImperium Dynamics

No Result
View All Result
  • Features
    • Bulk Texts
    • Personal Conversations
    • Event Reminders
    • Reviews
  • Industries
    • Nonprofits
    • Political Campaign
    • Event Management
    • Real Estate
  • Power Automate
  • Documentation
    • API Documentation
    • Power Platform Custom Connector Documentation
  • Pricing
  • Blog
  • Contact
  • Request a demo
  • Login

Powered byImperium Dynamics